

MLflow とは
MLflow とは、MLライフサイクルを管理するためのOSSのツールです。MLflowは4つの機能を提供しています。
- MLFlow Tracking: 実験の管理
- MLFlow Projects: 実行環境の管理
- MLFlow Models: モデルのデプロイやPipeline化
- MLFlow Model Registry: モデルのバージョン管理
この記事では実験管理の機能であるMLflow Trackingについて取り扱います。
MLflow Tracking
MLflowの実験管理は次の3つの要素から構成されます。
- Run
一回の試行(e.g. 実験, 学習) - Experiment
Runを束ねるグループ - Artifact
Runで得られる出力や中間生成物のストレージ

実際にMLflow Trackingを使ってみます。まずはライブラリをインストールします。
$ pip install mlflow
そして次のコードをmain.pyに保存して実行します。
import os
from random import random, randint
from mlflow import log_metric, log_param, log_artifact, log_artifacts

if __name__ == "__main__":
    # Log a parameter (key-value pair)
    log_param("param1", randint(0, 100))

    # Log a metric; metrics can be updated throughout the run
    log_metric("foo", random())
    log_metric("foo", random() + 1)
    log_metric("foo", random() + 2)

    # Log an artifact (output file)
    if not os.path.exists("outputs"):
        os.makedirs("outputs")
    with open("outputs/test.txt", "w") as f:
        f.write("Hello world!")
    log_artifacts("outputs") # Record folder
$ python main.py
mlrunsフォルダとoutputsフォルダが生成されます。
.
├── __init__.py
├── main.py
├── mlruns
│   └── 0
│       ├── 21af48fda35a4aa1b61ef3622f71e4c0
│       │   ├── artifacts
│       │   │   └── test.txt
│       │   ├── meta.yaml
│       │   ├── metrics
│       │   │   └── foo
│       │   ├── params
│       │   │   └── param1
│       │   └── tags
│       │       ├── mlflow.runName
│       │       ├── mlflow.source.git.commit
│       │       ├── mlflow.source.name
│       │       ├── mlflow.source.type
│       │       └── mlflow.user
│       └── meta.yaml
└── outputs
    └── test.txt
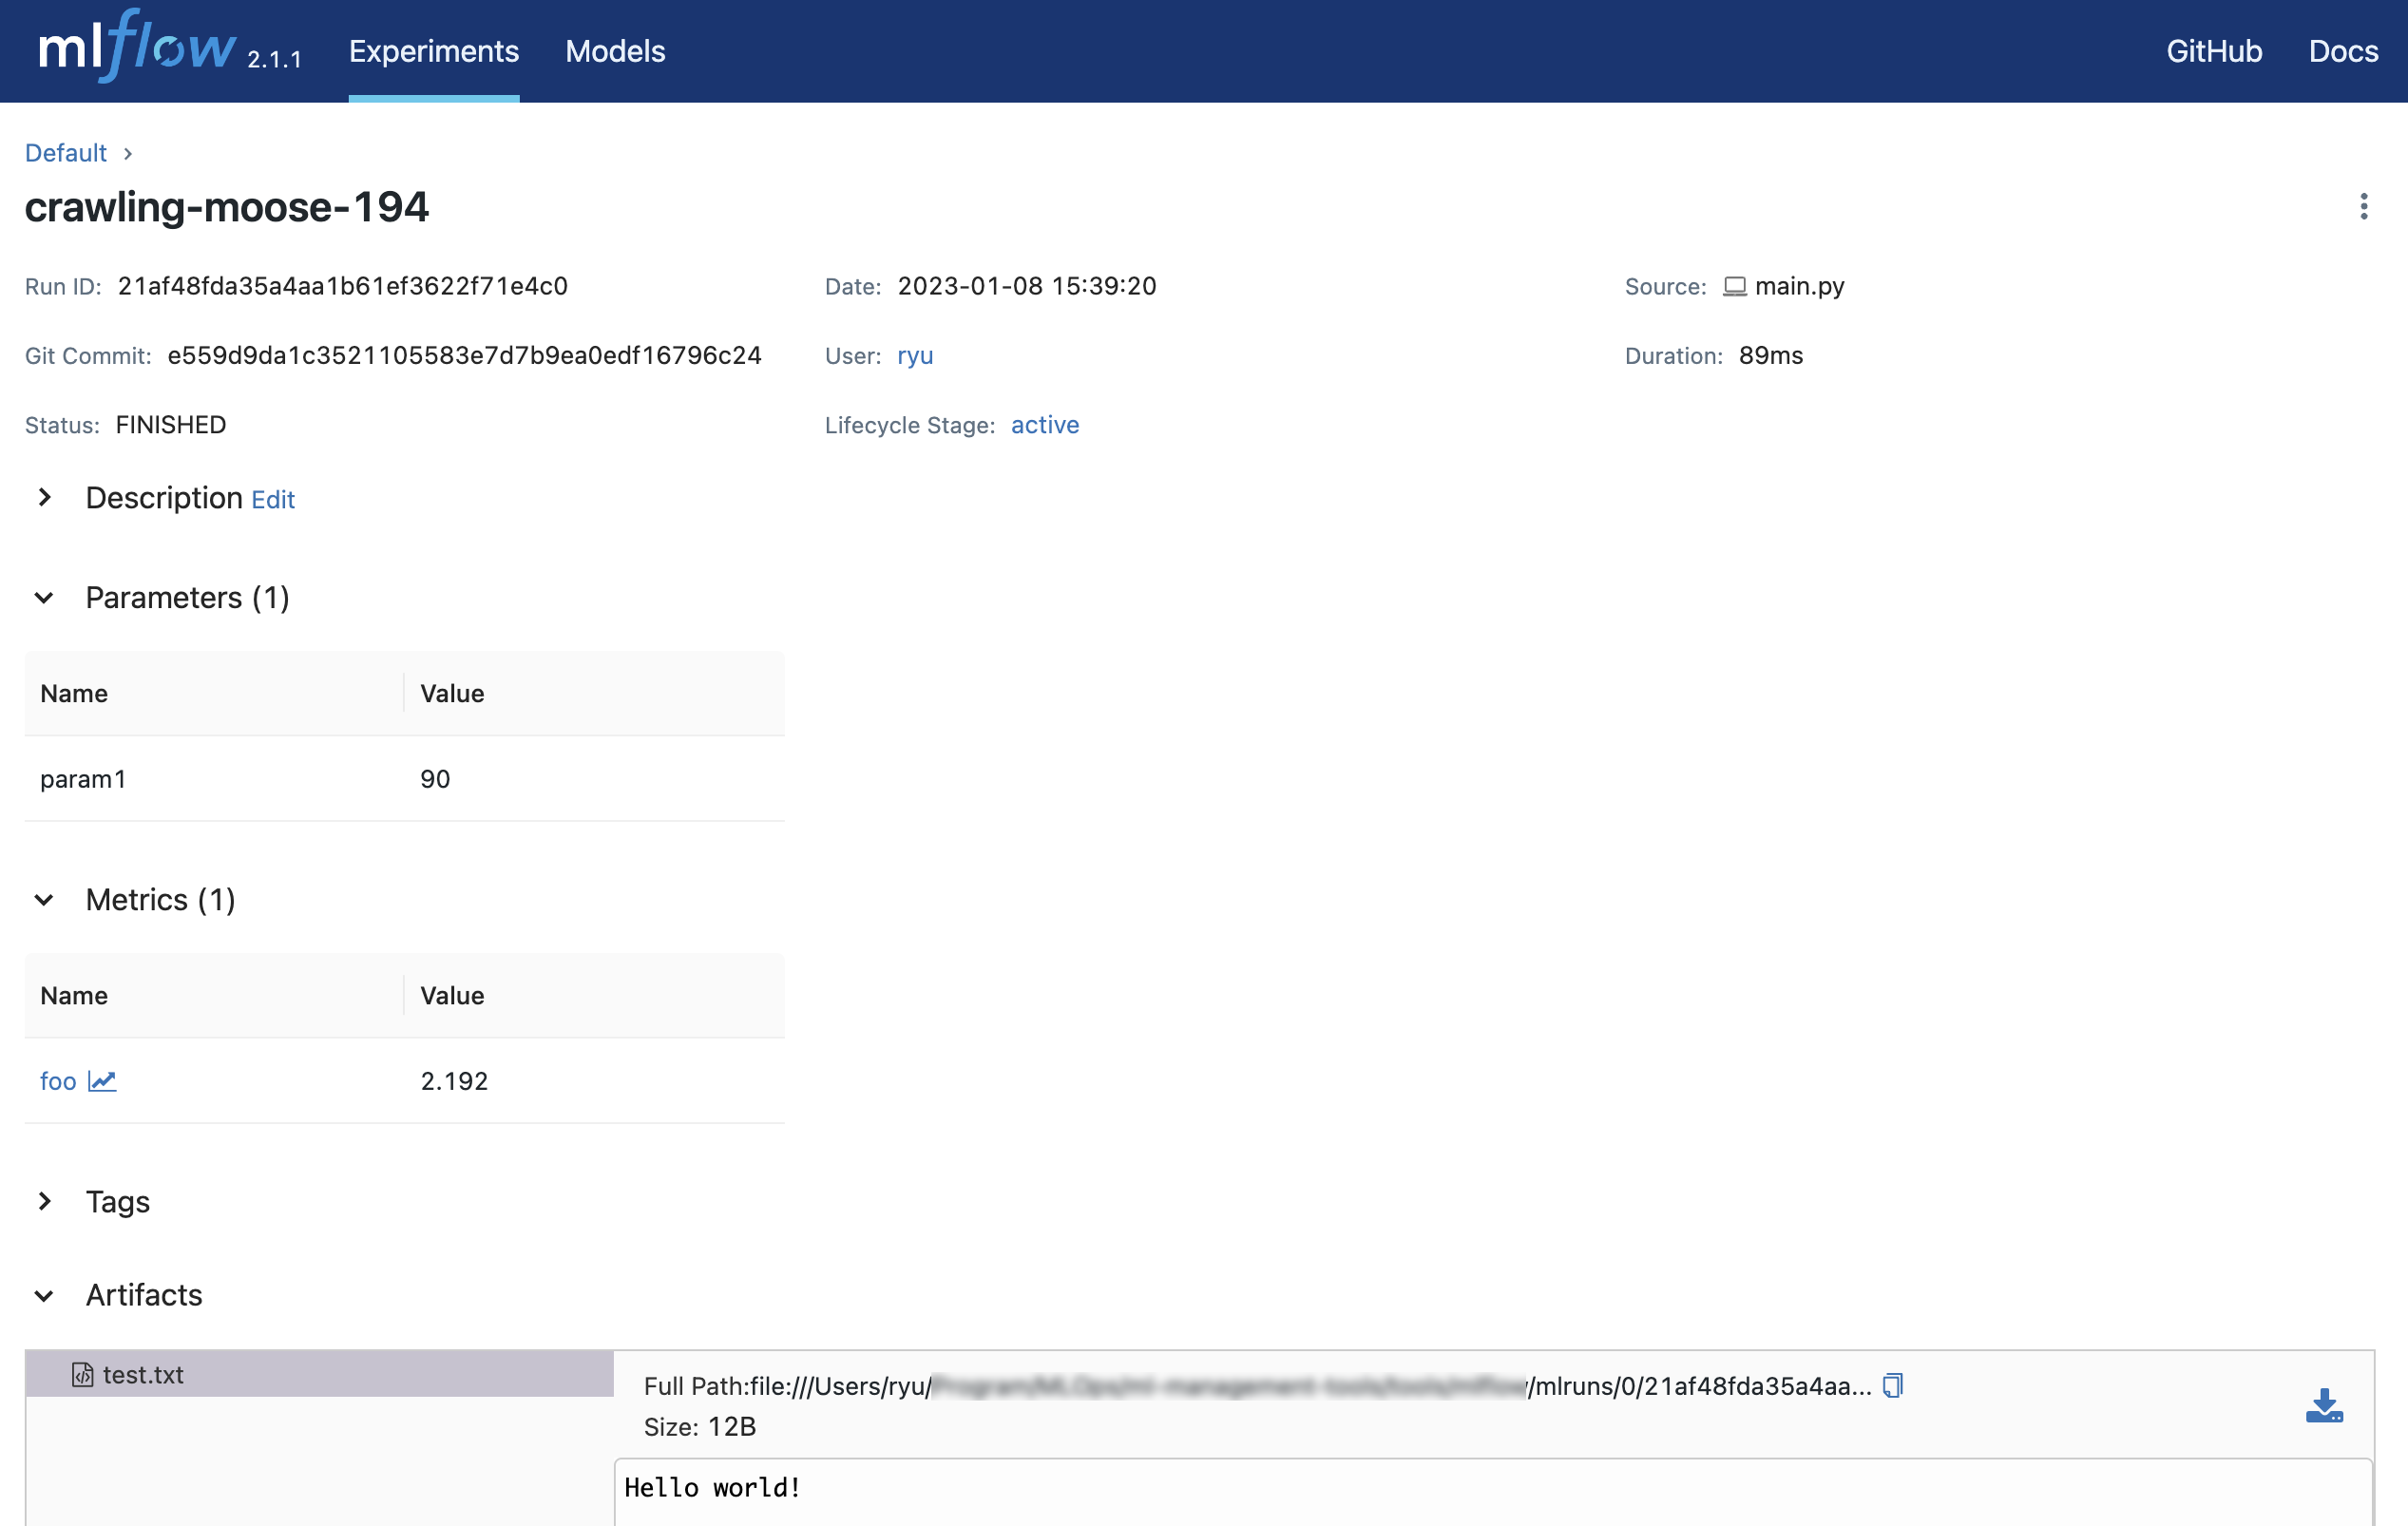
0がExperimentのID、21af48fda35a4aa1b61ef3622f71e4c0がRunのIDになります。
mlflow uiコマンドを実行します。
$ mlflow ui

[2023-01-08 15:41:46 +0900] [54928] [INFO] Starting gunicorn 20.1.0
[2023-01-08 15:41:46 +0900] [54928] [INFO] Listening at: http://127.0.0.1:5000 (54928)
[2023-01-08 15:41:46 +0900] [54928] [INFO] Using worker: sync
[2023-01-08 15:41:46 +0900] [54930] [INFO] Booting worker with pid: 54930
[2023-01-08 15:41:47 +0900] [54931] [INFO] Booting worker with pid: 54931
[2023-01-08 15:41:47 +0900] [54932] [INFO] Booting worker with pid: 54932
[2023-01-08 15:41:47 +0900] [54933] [INFO] Booting worker with pid: 54933
[2023-01-08 15:41:55 +0900] [54928] [INFO] Handling signal: winch
[2023-01-08 15:41:58 +0900] [54928] [INFO] Handling signal: winch
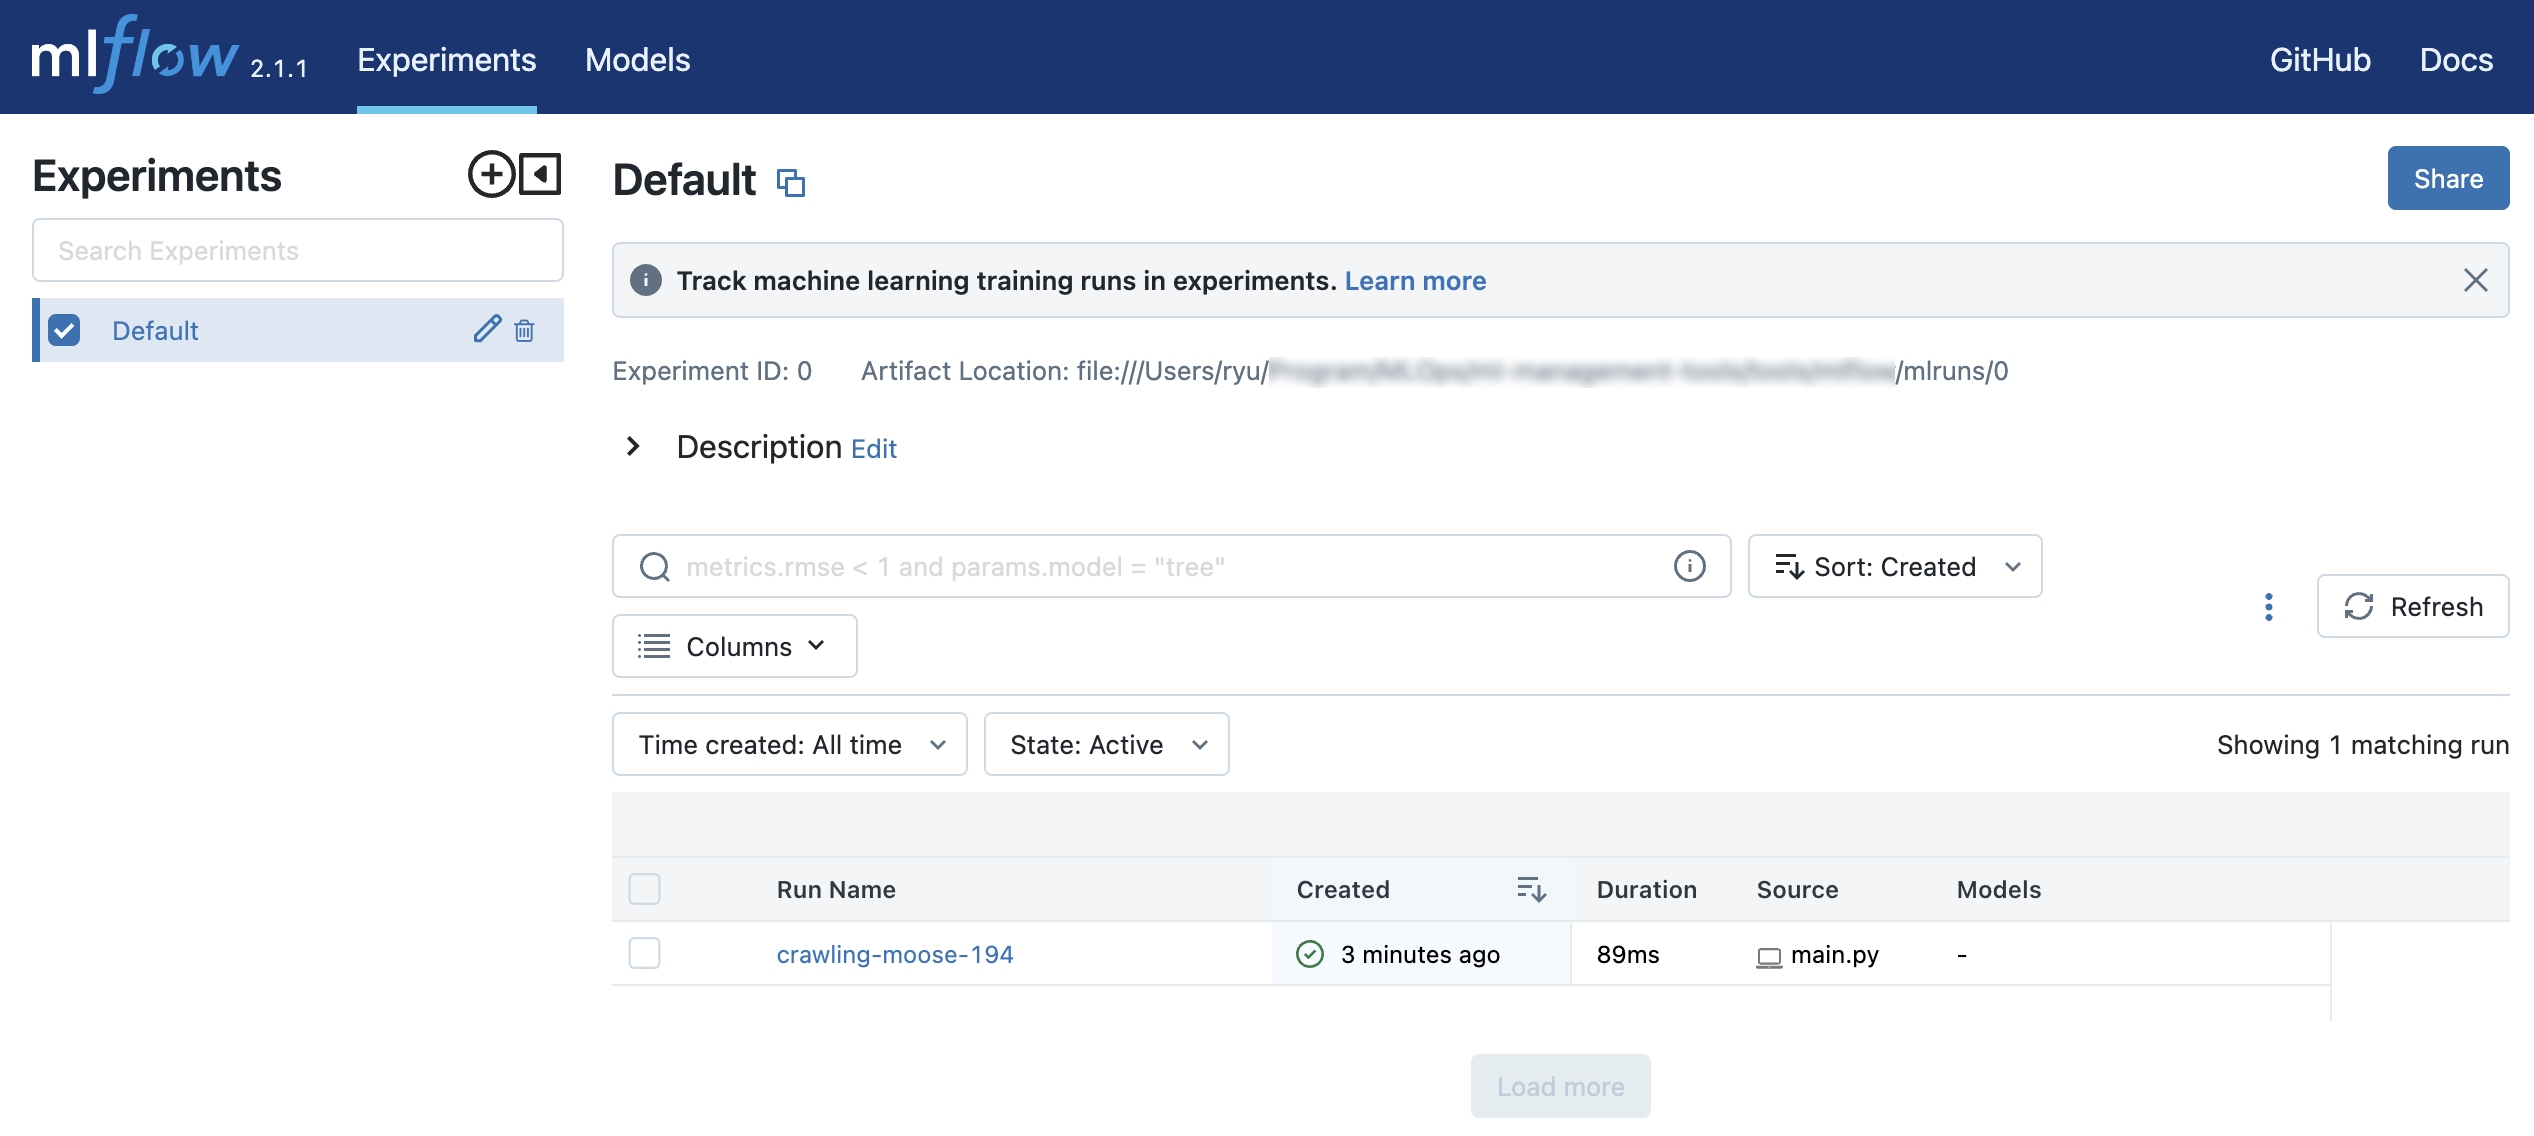
http://127.0.0.1:5000にアクセスするとブラウザ上で実験結果を確認することができます。
実験の管理対象
MLflowでは大きく次の4つの値が管理対象となります。
- Parameters
実験実行時のパラメータ - Tags
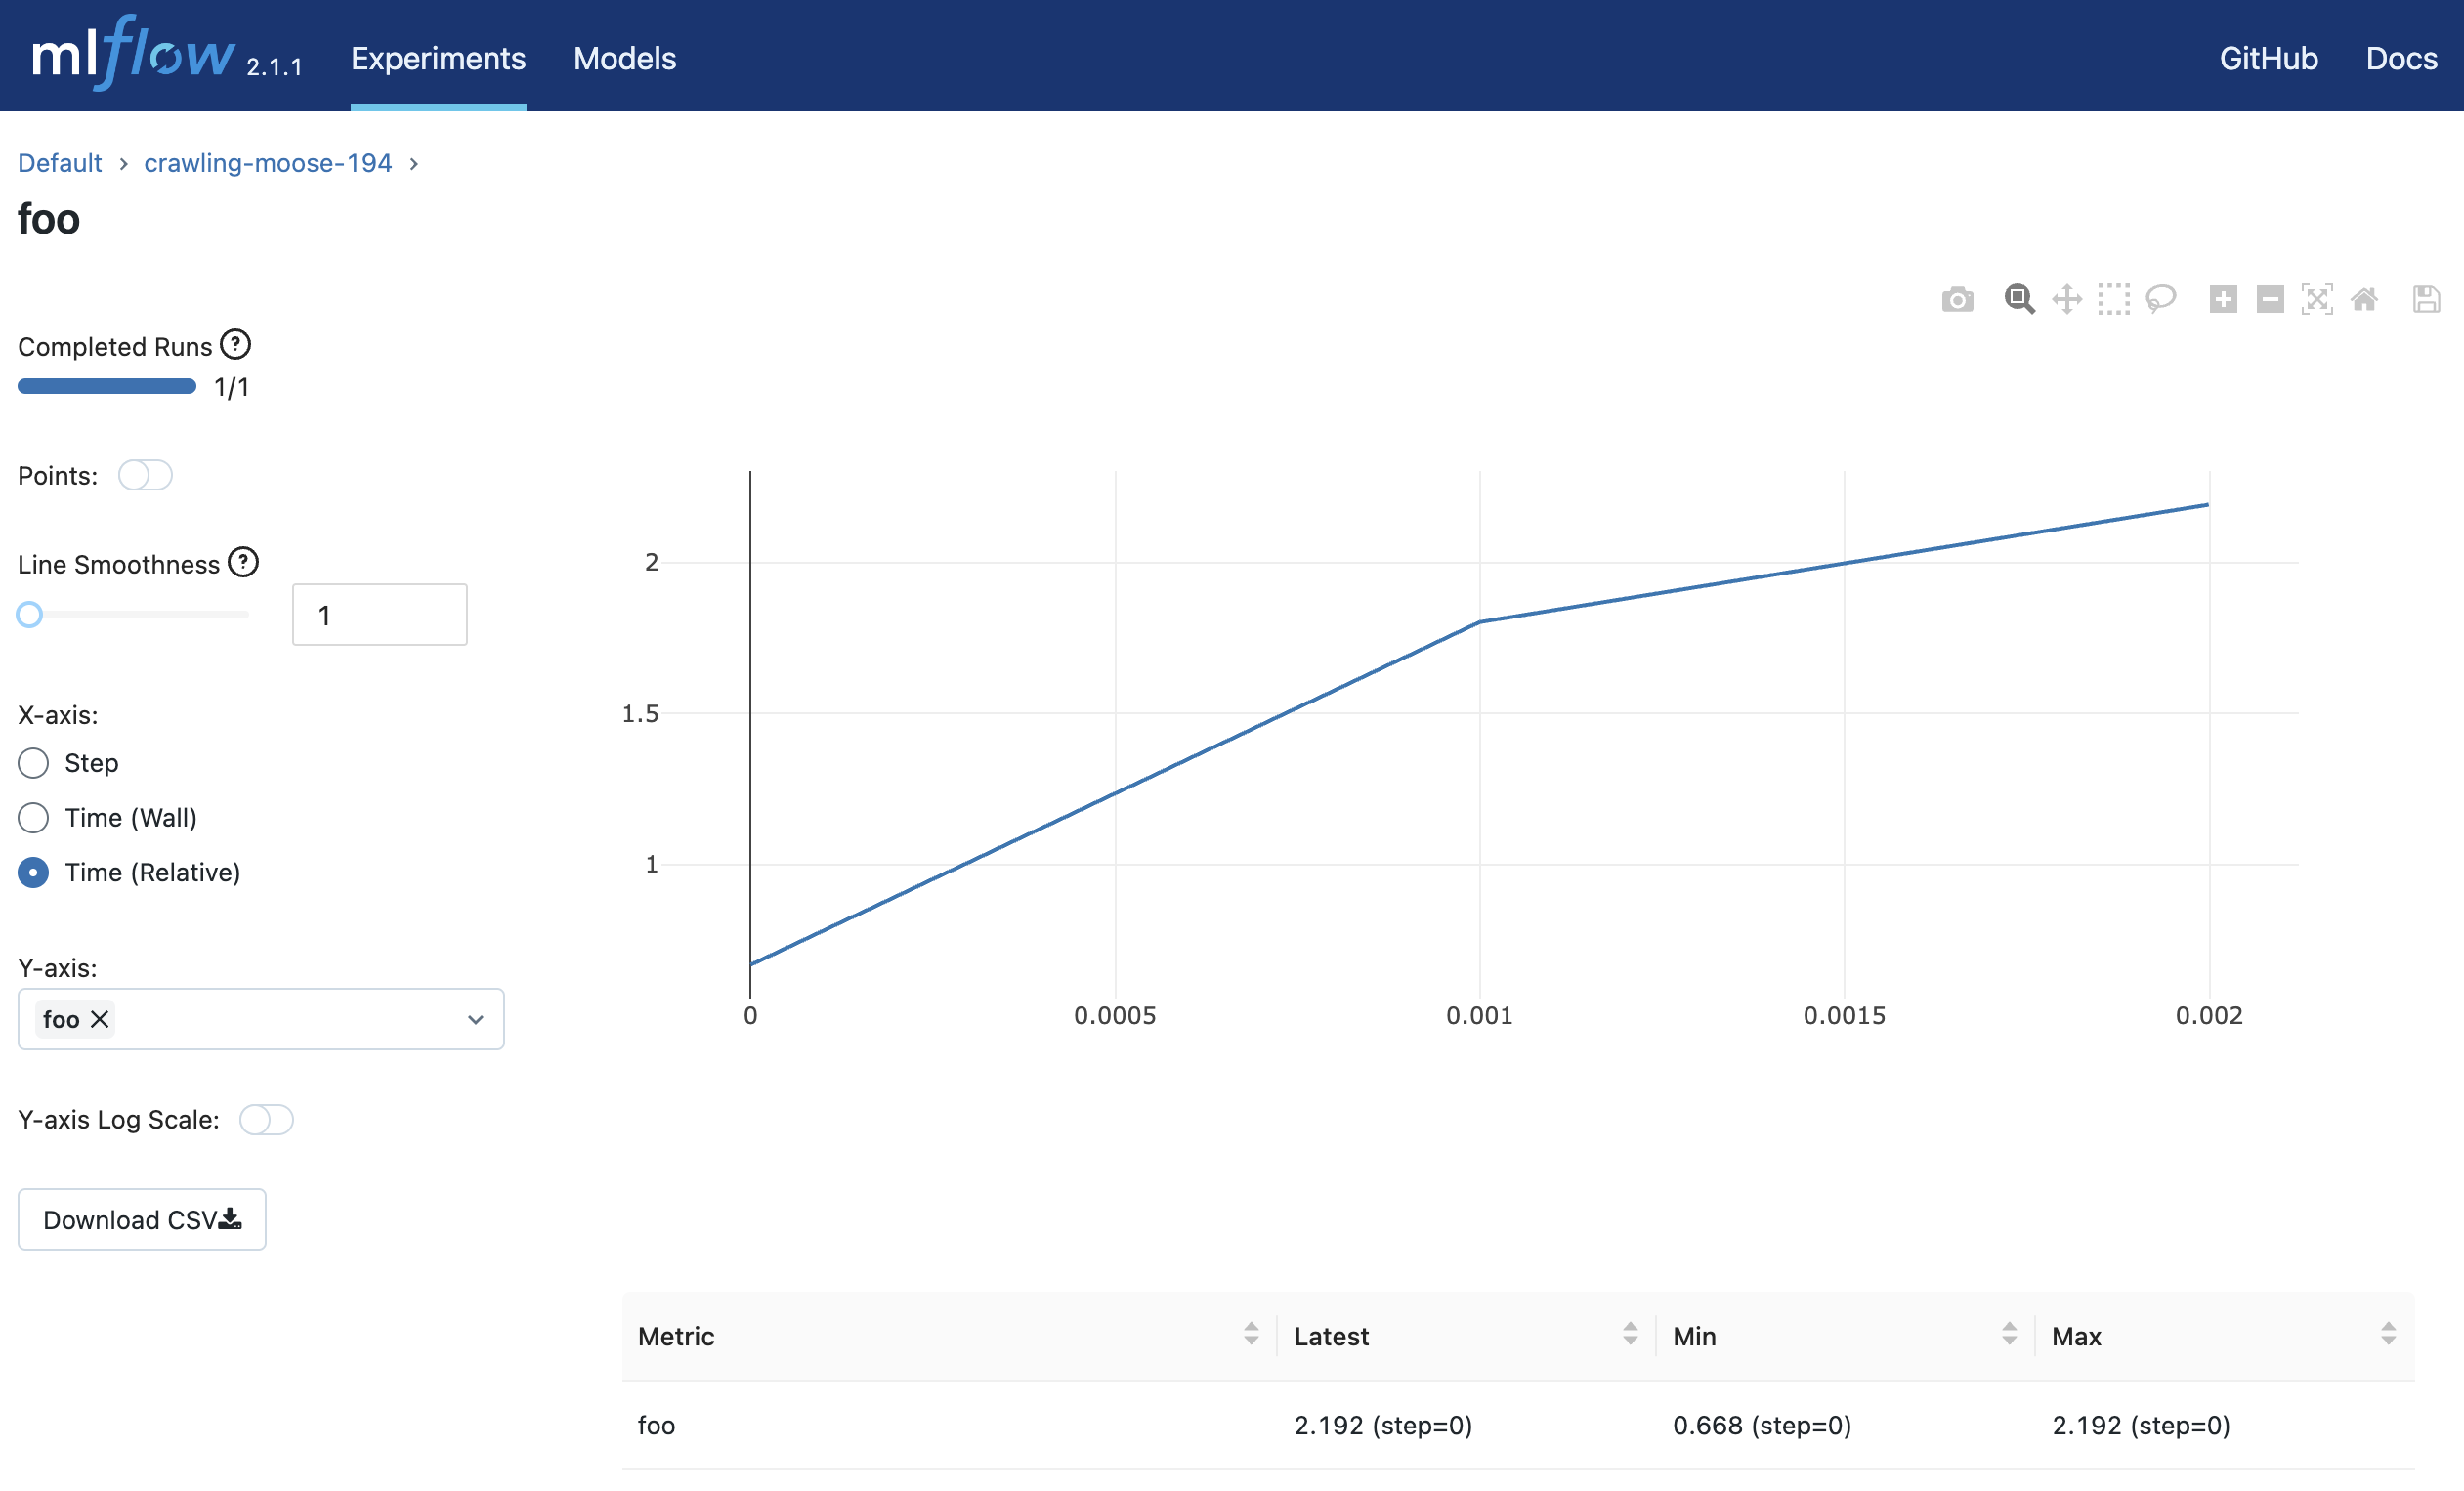
実験実行時のタグ - Metrics
実験の評価指標 - Artifacts
実験による生成ファイル
ロギングの関数
MLflowではPython、R、Java、またはREST APIを使用して、データをRunにロギングすることができます。
MLflow Tracking サーバー
mlflow serverコマンドを使ってMLflow Trackingサーバーを立てることができます。
$ mlflow server \
    --backend-store-uri /mnt/persistent-disk \
    --default-artifact-root s3://my-mlflow-bucket/ \
    --host 0.0.0.0
MLflow Trackingサーバーには次の2つのストレージに関するコンポーネントがあります。
- Backend Stores(
--backend-store-uri) - Artifact Stores(
--default-artifact-root)
Backend Stores
Backend Storeは実験や実行のメタデータ、実行のためのパラメータ、メトリクス、タグを保存する場所です。
--backend-store-uriには次のBackend Storeを指定することができます。
- ローカルファイルシステム
./path_to_storefile:/path_to_store
- SQLAlchemy 互換のある DB
<dialect>+<driver>://<username>:<password>@<host>:<port>/<database>
--backend-store-uriのデフォルト値は./mlrunsとなっています。
Artifact Stores
Artifact StoresはArtifactを保存する場所です。Artifact Storesは次のファイルシステムに対応しています。
- Amazon S3
- Google Cloud Storage
- Azure Blob Storage
- FTP server
- SFTP Server
- NFS
- HDFS
--default-artifact-rootではデフォルトのArtifactの場所を指定します。
自動ロギング
MLflowでは、自動ロギングという機能を使い、明示的にログのコードを書かずに自動的にメトリクス、パラメータ、モデルのログを取得することができます。次のライブラリの自動ロギングをサポートしています。
- Scikit-learn
- Keras
- Gluon
- XGBoost
- LightGBM
- Statsmodels
- Spark
- Fastai
- Pytorch
自動ロギングを使うには次の2種類の方法があります。
- 学習コードの前に
mlflow.autolog()関数を呼び出す - ライブラリ固有の関数を呼び出す(e.g.
mlflow.sklearn.autolog())
次のコードはsklearnの自動ロギングの例になります。
import mlflow

from sklearn.model_selection import train_test_split
from sklearn.datasets import load_diabetes
from sklearn.ensemble import RandomForestRegressor

mlflow.autolog()

db = load_diabetes()
X_train, X_test, y_train, y_test = train_test_split(db.data, db.target)

# Create and train models.
rf = RandomForestRegressor(n_estimators = 100, max_depth = 6, max_features = 3)
rf.fit(X_train, y_train)

# Use the model to make predictions on the test dataset.
predictions = rf.predict(X_test)
autolog_run = mlflow.last_active_run()
LightGBM の実験
irisデータセットをLightGBMで分類する実験をしてみます。
まずはMLflow Trackingサーバーを立てます。
$ mlflow server \
  --backend-store-uri ./mlruns \
  --default-artifact-root gs://GCS_BUCKET/mlruns \
  --host 0.0.0.0
そして次のコードを2回実行してみます。
from datetime import datetime
import lightgbm as lgb
from sklearn import datasets
from sklearn.model_selection import train_test_split
import mlflow

params = dict(
    test_size=0.2,
    random_state=42,
)

iris = datasets.load_iris()
X, y = iris.data, iris.target
X_train, X_test, y_train, y_test = train_test_split(X, y, **params)

lgb_params = dict(
    learning_rate=0.05,
    n_estimators=500,
)
model = lgb.LGBMClassifier(**lgb_params)

def mlflow_callback():
    def callback(env):
        for name, loss_name, loss_value, _ in env.evaluation_result_list:
            mlflow.log_metric(key=loss_name, value=loss_value, step=env.iteration)
    return callback

mlflow.set_tracking_uri("http://127.0.0.1:5000")
mlflow.set_experiment("EXP-1")

with mlflow.start_run(run_name=str(datetime.now())):
    mlflow.log_params({**params, **lgb_params})
    model.fit(
        X_train,
        y_train,
        eval_set=(X_test, y_test),
        eval_metric=["softmax"],
        callbacks=[
            lgb.early_stopping(10),
            mlflow_callback(),
        ])
    # Log an artifact (output file)
    with open("output.txt", "w") as f:
        f.write("Hello world!")
    mlflow.log_artifact("output.txt")
$ lightgbm_experiment.py
$ lightgbm_experiment.py
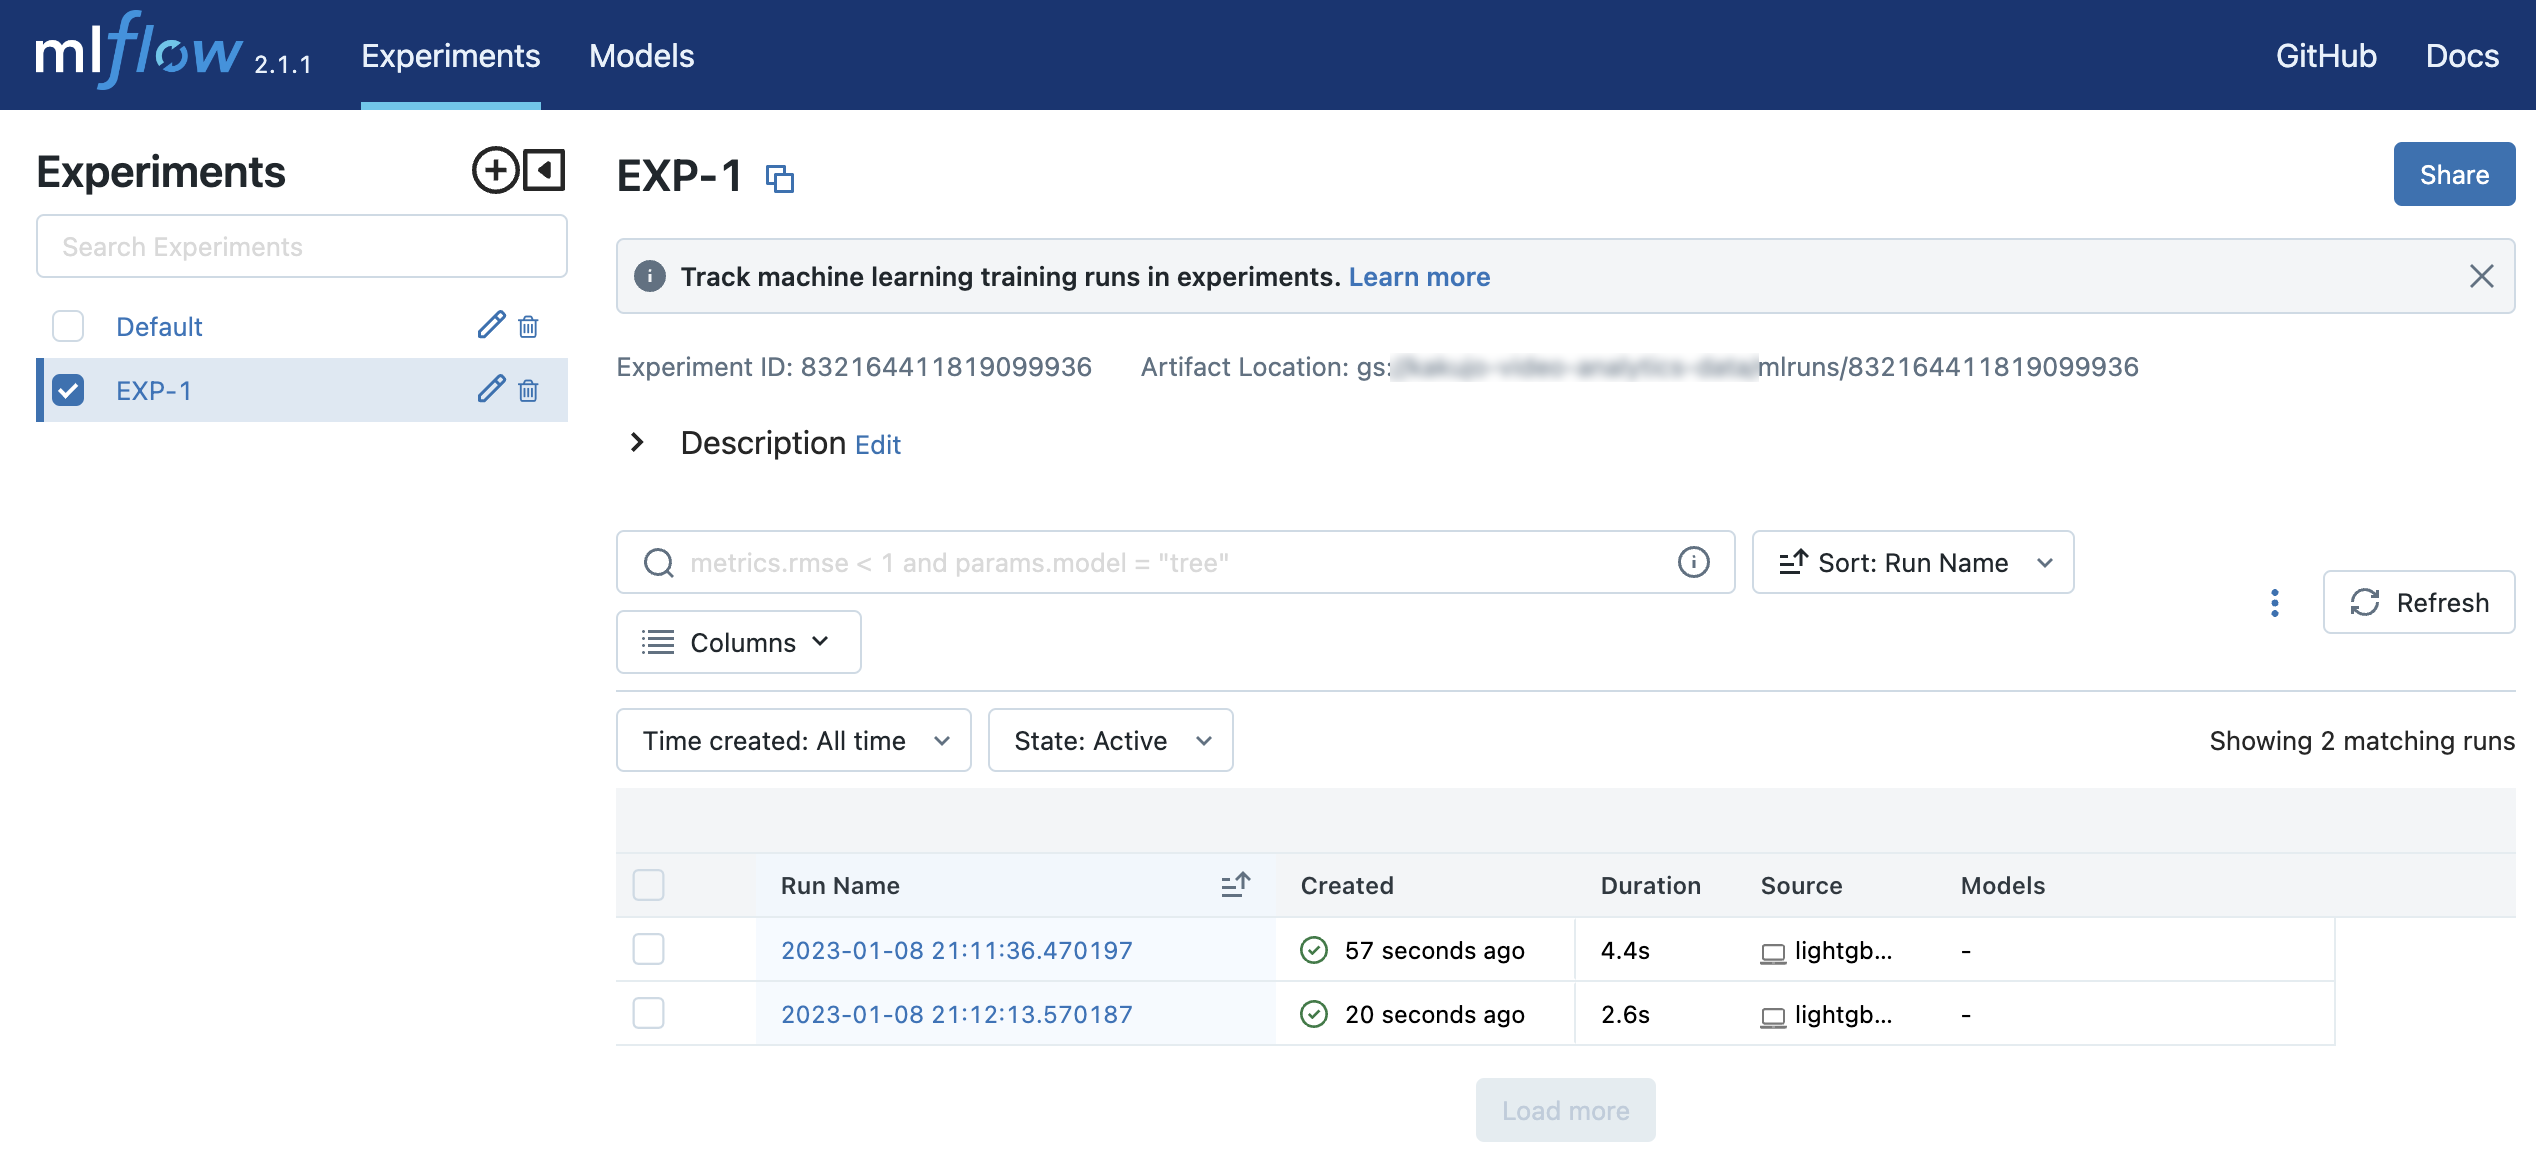
http://127.0.0.1:5000にアクセスすると、EXP-1というExperimentの中に2つのRunを確認することができます。
参考


Ryusei Kakujo


Weave the future of cities through data
Transportation modeling/ Urban planning/ Machine learning/ Computer science/ GIS