

FastAPI's Automatic Documentation
FastAPI, by default, provides out-of-the-box support for two of the most powerful tools for automatic API documentation - Swagger UI and ReDoc. Both these tools interpret the OpenAPI specification that FastAPI generates from your code, providing a user-friendly interface that developers can use to understand how to interact with your API.
Swagger UI
Swagger UI is a popular tool for generating interactive API documentation. With Swagger UI, developers can easily explore all the different endpoints of your API, along with the associated details such as the HTTP methods, parameters, request bodies, and responses.
To access the Swagger UI in a FastAPI application, you simply navigate to the /docs endpoint on your running FastAPI server. For example, if your application is running locally on port 8000, you would go to http://localhost:8000/docs.
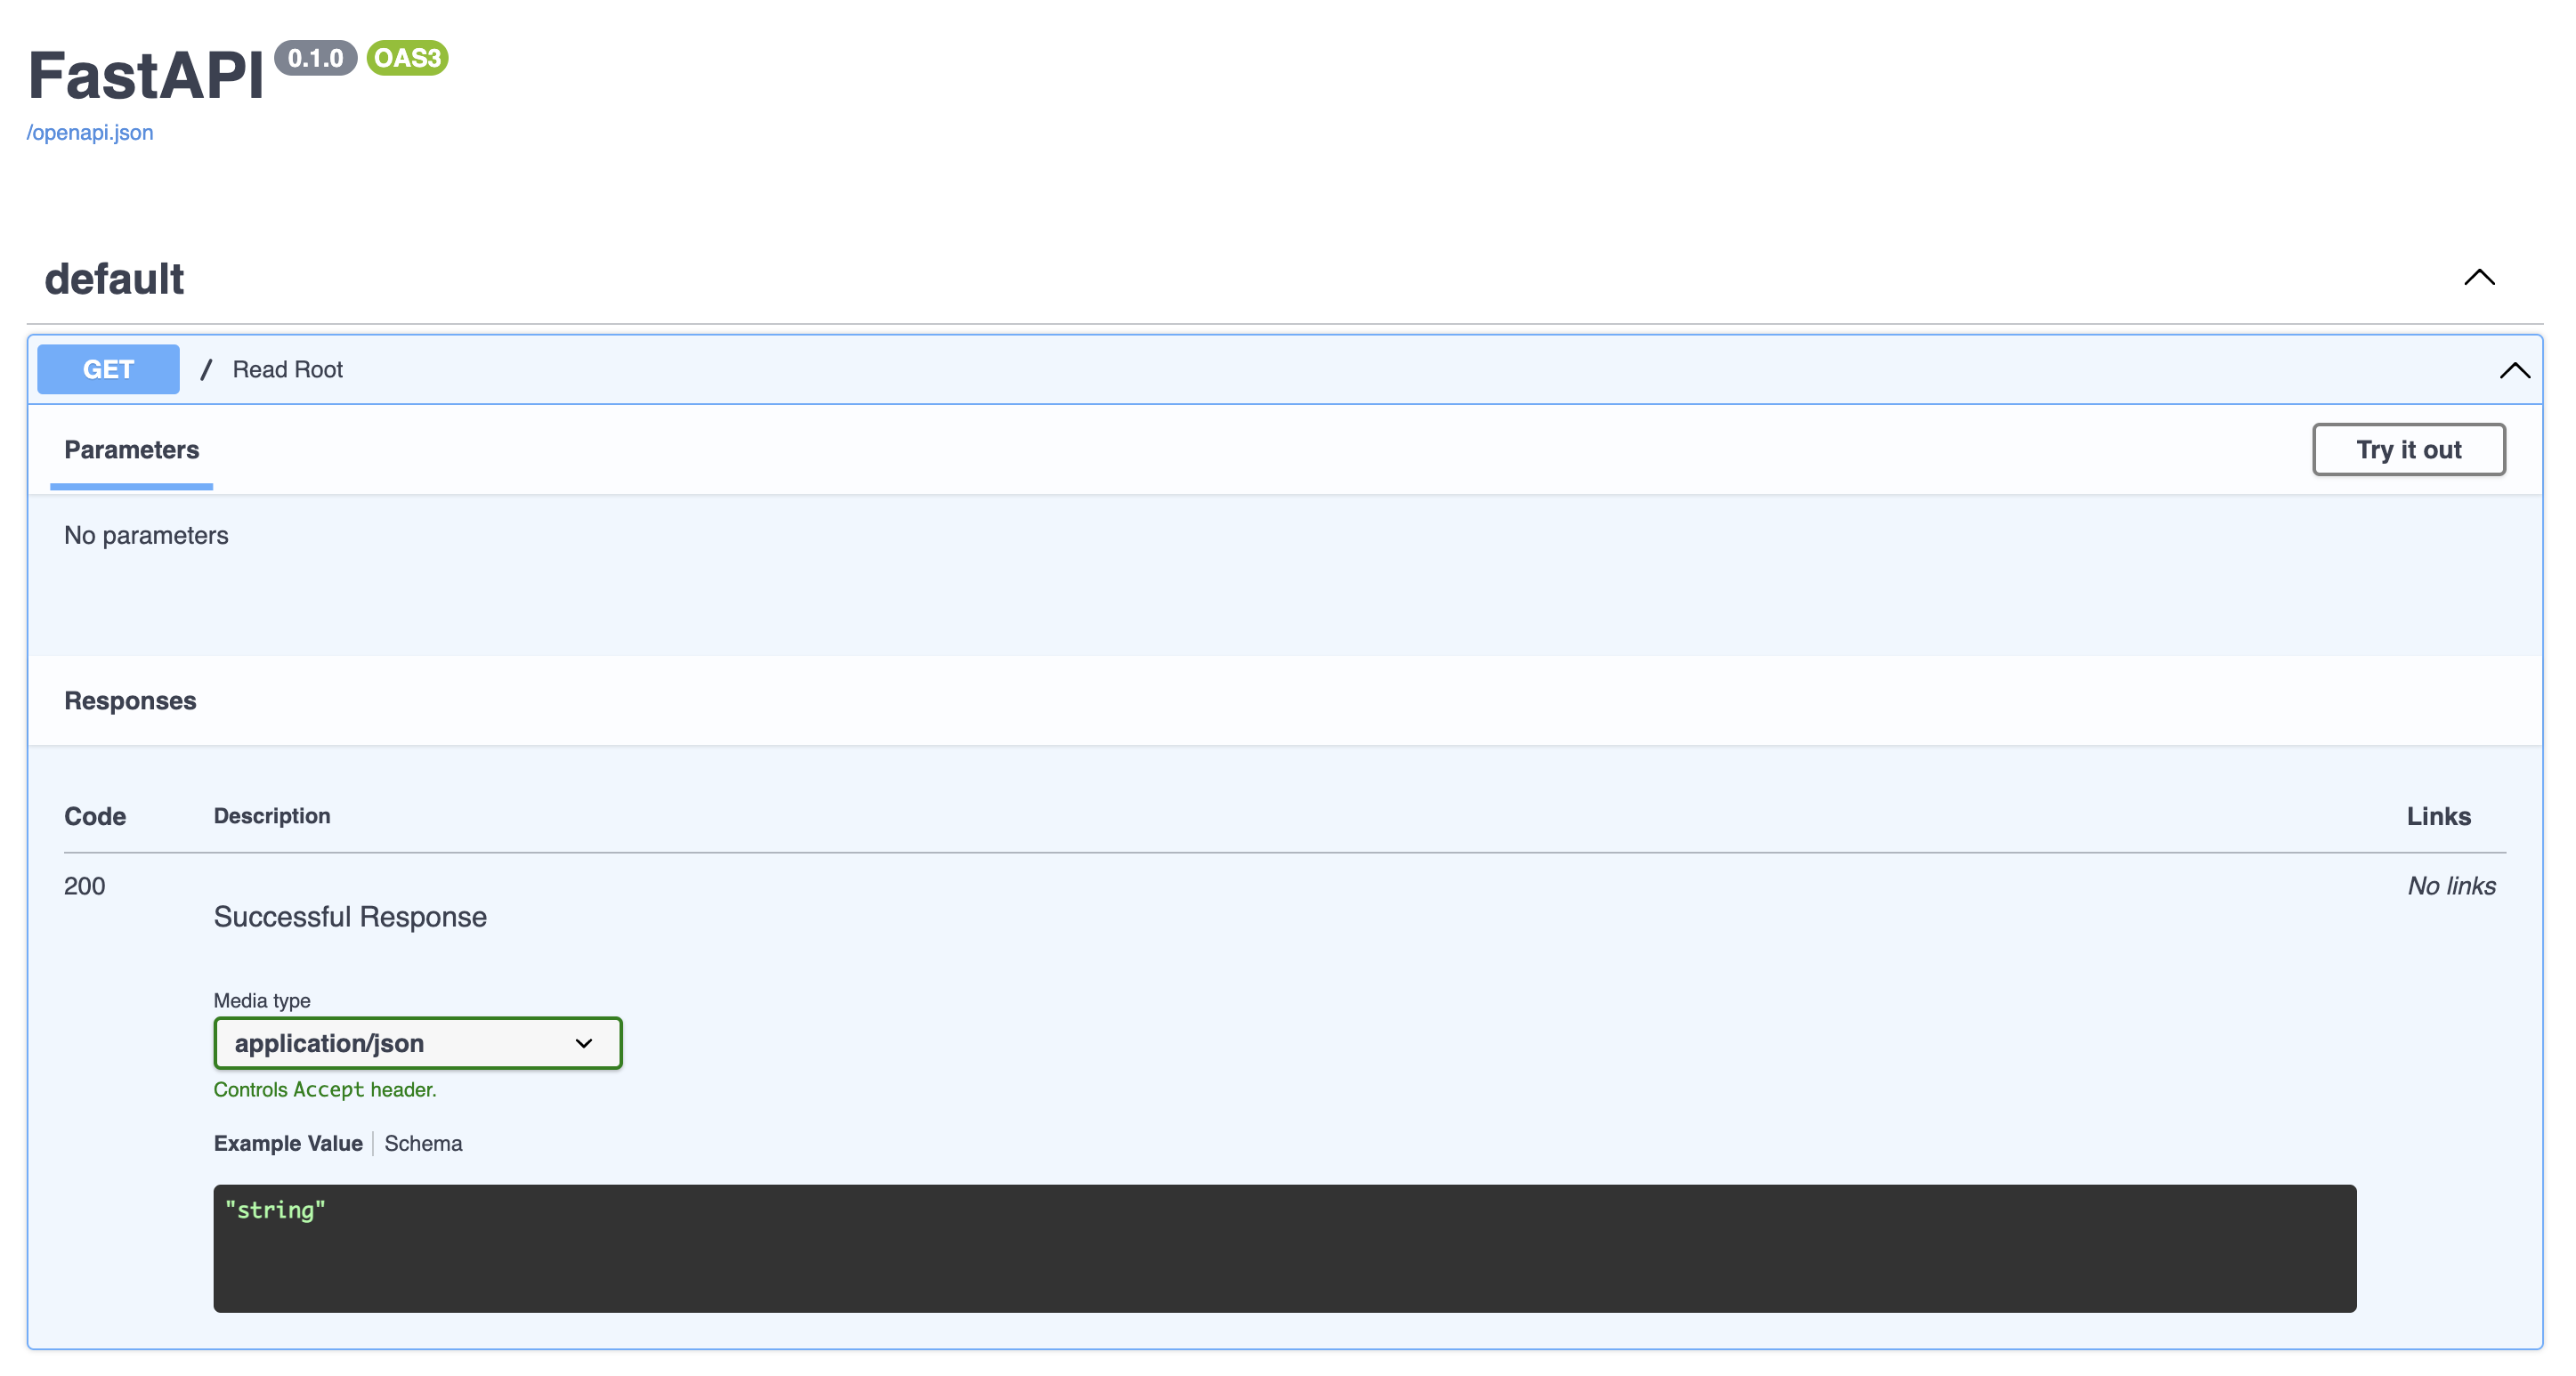
The Swagger UI provides an intuitive interface where developers can not only view the details of your API but also interact with it. This interaction is facilitated by the "Try it out" button, which allows developers to make requests to your API directly from the browser and view the responses in real time.
ReDoc
ReDoc is another tool for generating beautiful, human-readable, and interactive API documentation. While Swagger UI focuses on interactivity, ReDoc shines in presenting a clean, three-panel layout with a focus on clarity and readability.
To access the ReDoc interface, you navigate to the /redoc endpoint on your running FastAPI server. For example, if your application is running locally on port 8000, you would go to http://localhost:8000/redoc.
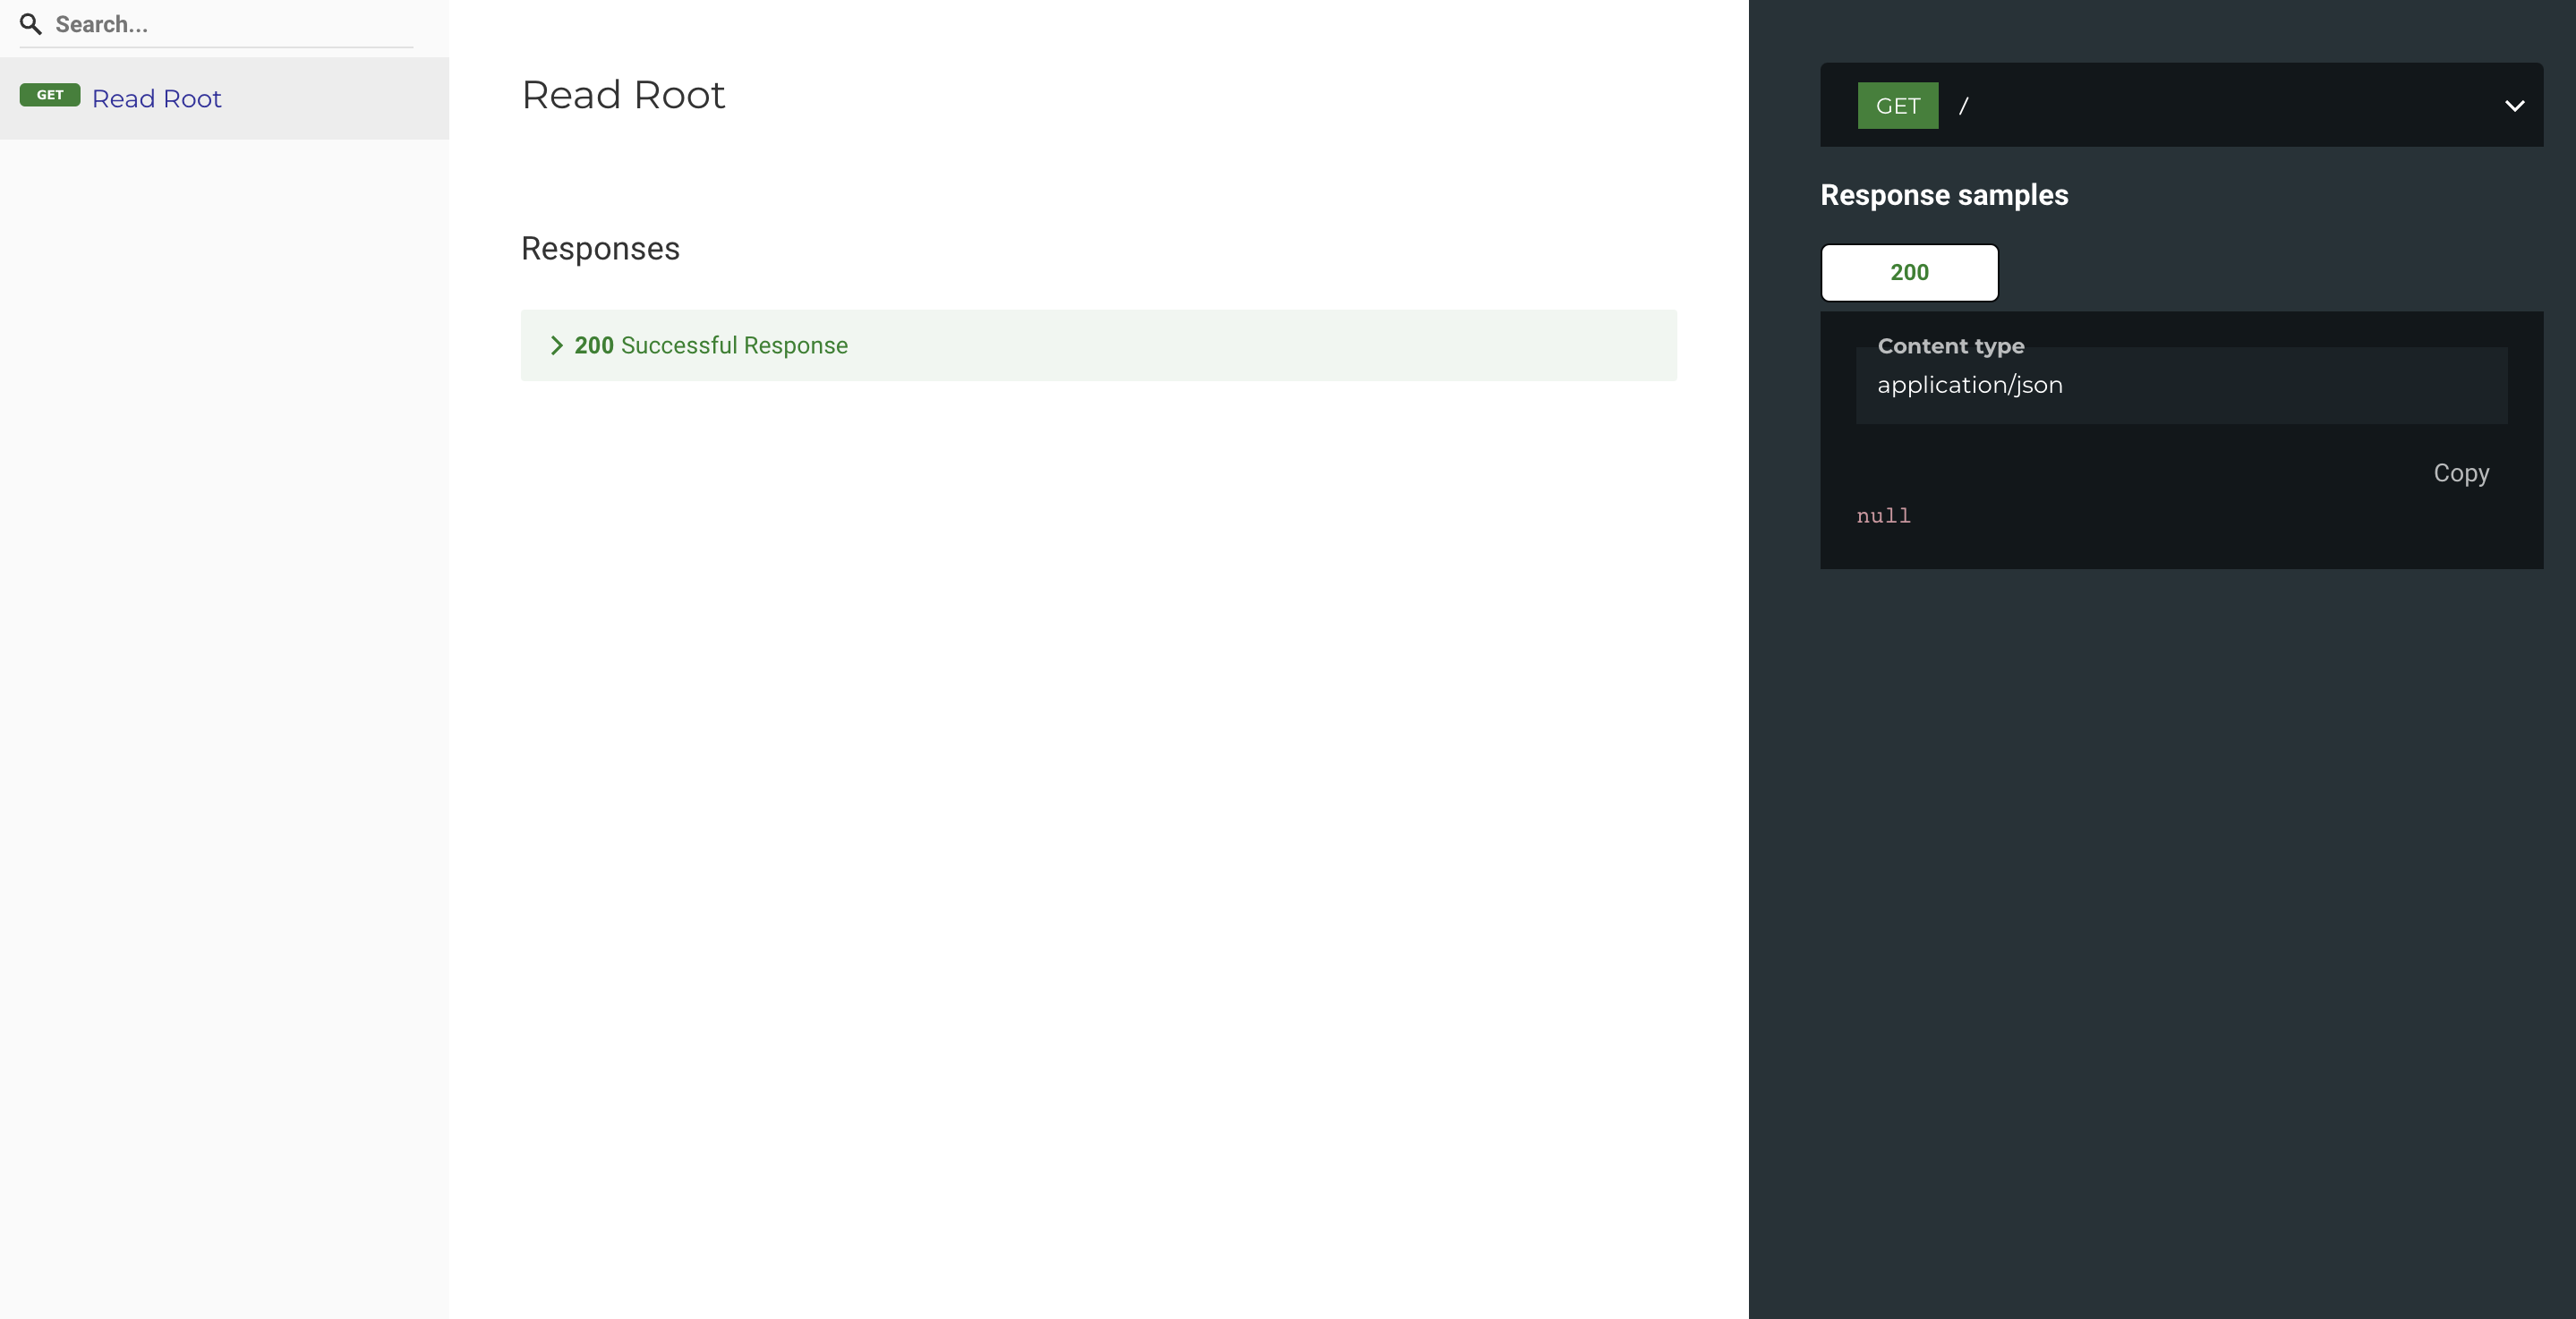
ReDoc provides a more minimalist, linear view of your API endpoints, which some developers might find easier to navigate. It still presents all the important details such as endpoints, methods, parameters, and responses, but in a more streamlined way. However, unlike Swagger UI, ReDoc does not offer an option to interact with the API directly from the documentation.
Adding Metadata to Your API
Metadata in your API is essentially data about your API. It provides contextual details and descriptive information about your API's functionality. FastAPI allows you to easily define metadata for your API, and this metadata is included in the generated OpenAPI schema, hence being visible in the automatic API documentation.
Defining API Metadata
You can define metadata for your FastAPI application when creating an instance of the FastAPI class. Here's an example:
from fastapi import FastAPI

app = FastAPI(
    title="My Super API",
    description="This is a very custom API for our organization",
    version="2.5.0",
)
In this case, the metadata includes the API's title, a description, and the version. This information will appear at the top of your API documentation in both Swagger UI and ReDoc.
Adding Metadata to API Routes
FastAPI also allows you to add metadata to individual API routes. This can be done using the tags parameter in FastAPI's route decorators, which groups related routes together in the documentation.
@app.get("/items/", tags=["items"])
async def read_items():
    return [{"name": "Item 1"}, {"name": "Item 2"}]

@app.get("/users/", tags=["users"])
async def read_users():
    return [{"username": "user1"}, {"username": "user2"}]
In this example, the /items/ and /users/ routes are grouped under "items" and "users" tags, respectively. In the generated documentation, endpoints will be grouped by these tags, making the API easier to navigate.
Adding Descriptions to API Routes
You can add descriptions to your routes using docstrings. The first line of the docstring is used as a summary, and any subsequent lines are used as a description.
@app.get("/items/{item_id}")
async def read_item(item_id: str):
    """
    Get a specific item by ID.

    - **item_id**: ID of the item to get
    """
    return {"item_id": item_id}
In this example, the summary ("Get a specific item by ID.") and description ("- **item_id**: ID of the item to get") will be included in the API documentation for the /items/{item_id} route.
Documenting Response Models
FastAPI uses Pydantic models to define the data structures for responses. These models provide a way to define the expected output of your API endpoints, and automatically generate JSON Schema definitions for your API documentation.
Basic Usage of Response Models
To specify a response model for a route, you can use the response_model parameter in the route decorator. The following example demonstrates this concept:
from fastapi import FastAPI
from pydantic import BaseModel

class Item(BaseModel):
    name: str
    price: float

app = FastAPI()

@app.get("/items/{item_id}", response_model=Item)
async def read_item(item_id: str):
    # implementation omitted
    pass
In this example, the response_model parameter specifies that the /items/{item_id} route will return an instance of the Item model. FastAPI will use this information to validate the response data, serialize it into JSON, and include it in the OpenAPI schema for your API.
Adding Descriptions to Response Models
You can add a description for your response model by using the responses parameter in the route decorator. This parameter accepts a dictionary where the keys are HTTP status codes and the values are dictionaries containing the description and model for the response.
@app.get("/items/{item_id}", responses={200: {"model": Item, "description": "The requested item"}})
async def read_item(item_id: str):
    # implementation omitted
    pass
In this example, the responses parameter is used to specify a description ("The requested item") for the 200 status code response that uses the Item model. This description will be visible in the API documentation.
Documenting Different Possible Responses
FastAPI allows you to specify different possible responses using the responses parameter. You can specify different models or data structures for different status codes.
@app.get("/items/{item_id}", responses={
    200: {"model": Item, "description": "The requested item"},
    404: {"description": "Item not found"},
    400: {"description": "Invalid request", "content": {"application/json": {"example": {"detail": "Invalid item ID"}}}},
})
async def read_item(item_id: str):
    # implementation omitted
    pass
In this example, the responses parameter is used to document the possible 200, 404, and 400 status code responses. For the 400 status code, an example response is also provided.
Documenting Query Parameters and Request Bodies
In FastAPI, query parameters and request bodies are usually defined using Python's type hints along with Pydantic models. These provide a clear and concise way to specify what data is expected in a request. However, to create comprehensive API documentation, you might need to add additional information such as descriptions, examples, and validation constraints. FastAPI makes this easy by providing the Query and Body classes for query parameters and request bodies, respectively.
Documenting Query Parameters
To add documentation for query parameters, you can use the Query class from FastAPI. This class provides a way to define query parameters with additional metadata.
from fastapi import FastAPI, Query

app = FastAPI()

@app.get("/items/")
async def read_items(q: Optional[str] = Query(None, description="The query string to filter items", example="item_name")):
    return {"q": q}
In this example, the Query class is used to add a description and an example for the q query parameter. When viewing the documentation in Swagger UI or ReDoc, the additional information will be displayed alongside the parameter.
Documenting Request Bodies
To add documentation for request bodies, you can use the Body class from FastAPI. This class allows you to define request bodies with additional metadata.
from fastapi import FastAPI, Body
from pydantic import BaseModel
from typing import Optional

class Item(BaseModel):
    name: str
    description: Optional[str] = None
    price: float
    tax: Optional[float] = None

app = FastAPI()

@app.post("/items/")
async def create_item(item: Item = Body(..., description="The item to create", example={"name": "item_name", "price": 42.0})):
    return {"item": item}
In this example, the Body class is used to add a description and an example for the item request body. The additional information will be displayed in the API documentation alongside the request body.
Documenting Fields within Pydantic Models
You can also provide documentation for individual fields within Pydantic models using the Field class from Pydantic.
from pydantic import BaseModel, Field
from typing import Optional

class Item(BaseModel):
    name: str = Field(..., description="The name of the item", example="item_name")
    description: Optional[str] = Field(None, description="A brief description of the item", example="A sample item")
    price: float = Field(..., description="The price of the item", example=42.0)
    tax: Optional[float] = Field(None, description="The tax on the item", example=3.5)
In this example, the Field class is used to add descriptions and examples for each field in the Item model. This information will be displayed in the API documentation when the model is used as input or output.


Ryusei Kakujo


Weave the future of cities through data
Transportation modeling/ Urban planning/ Machine learning/ Computer science/ GIS